
Natural, environmentally sustainable, and aesthetically pleasing, there’s little wonder why thin stone veneers have become a popular choice of masonry material with homeowners. The benefits are widely recognized and contractors are finding there’s a huge payoff in customer satisfaction (and property values).
But good contractors are increasingly understanding that what you put behind the stone matters just as much as the stone itself. They are educating themselves on the importance, make that necessity, of getting the veneer to remain adhered over the long haul.
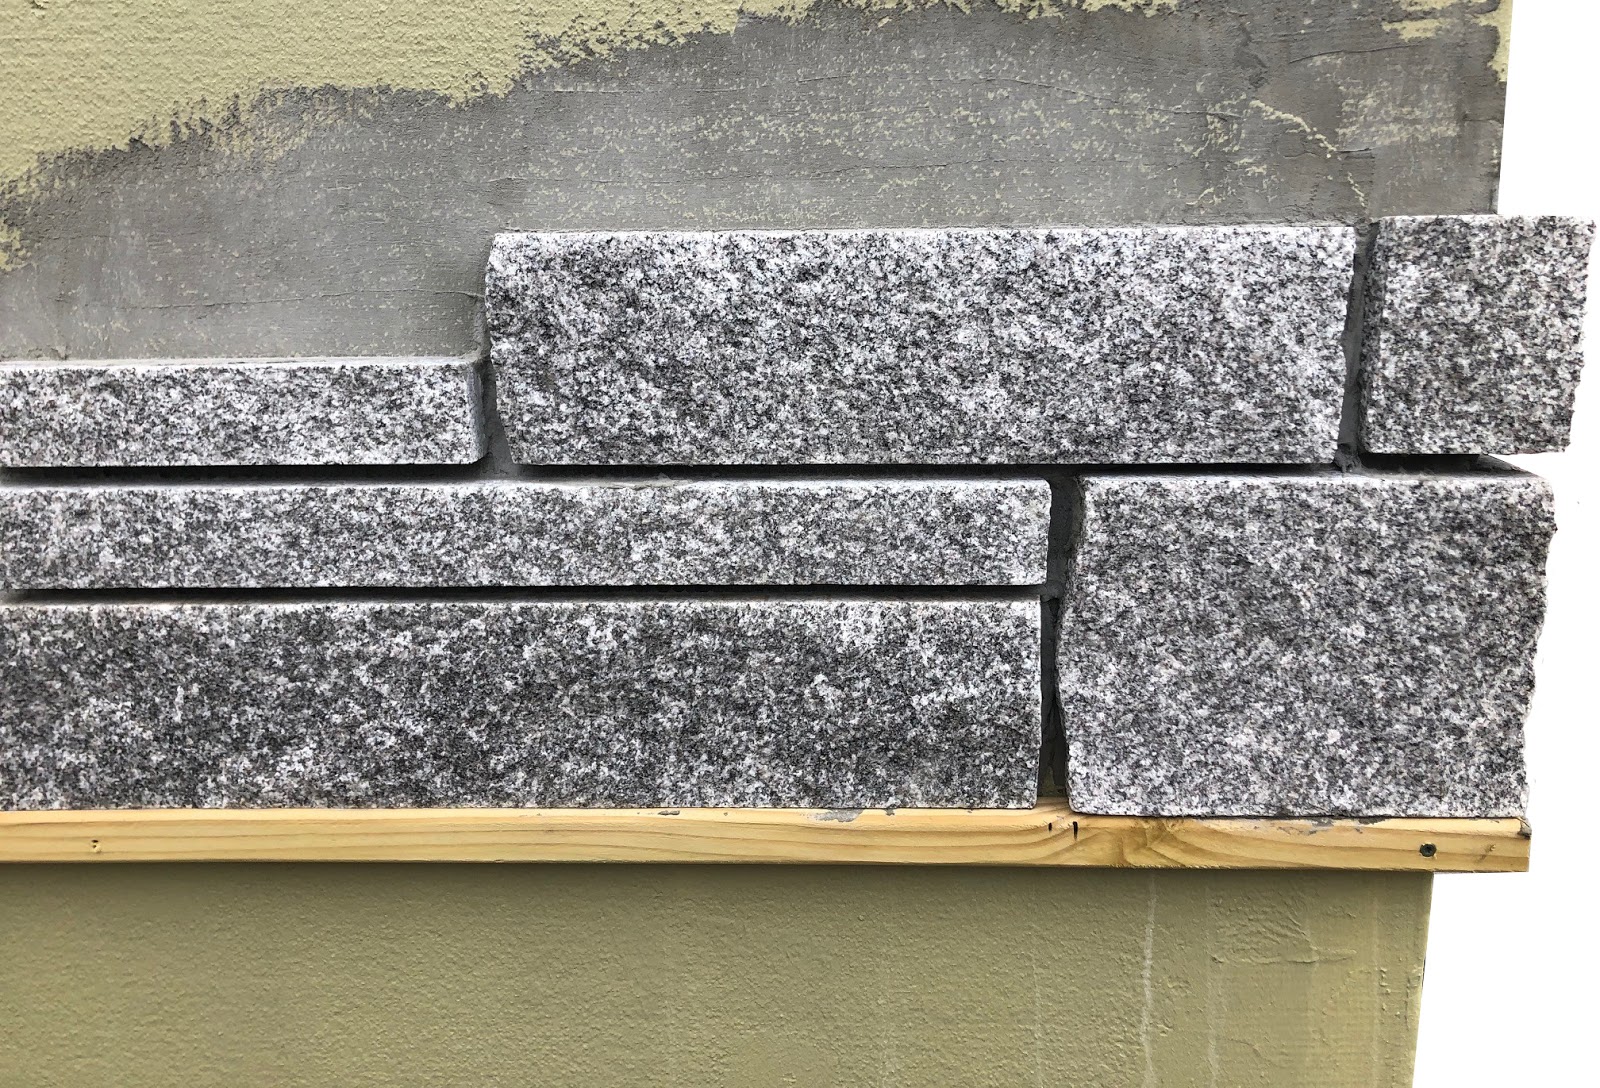
Pictured: BERKSHIRE™ split face thin veneer in WOODBURY GRAY™ granite
Why is veneer adhesion failure such a challenge? Rainwater infiltration or plain atmospheric moisture can get trapped behind, and within nooks and crannies. This osmosis can lead to hydrostatic pressure or movement in the substrate that can push stone off the walls. It’s a problem that can occur anywhere, within a couple of months or up to a couple of years, of a project's completion. Either way, the problem is not only damaging, but it’s also costly — repairs are upwards of sixty dollars a square foot. The good news is that with a few key preparatory and installation steps along with a mere couple dollars of material, such gloomy scenarios can be prevented.
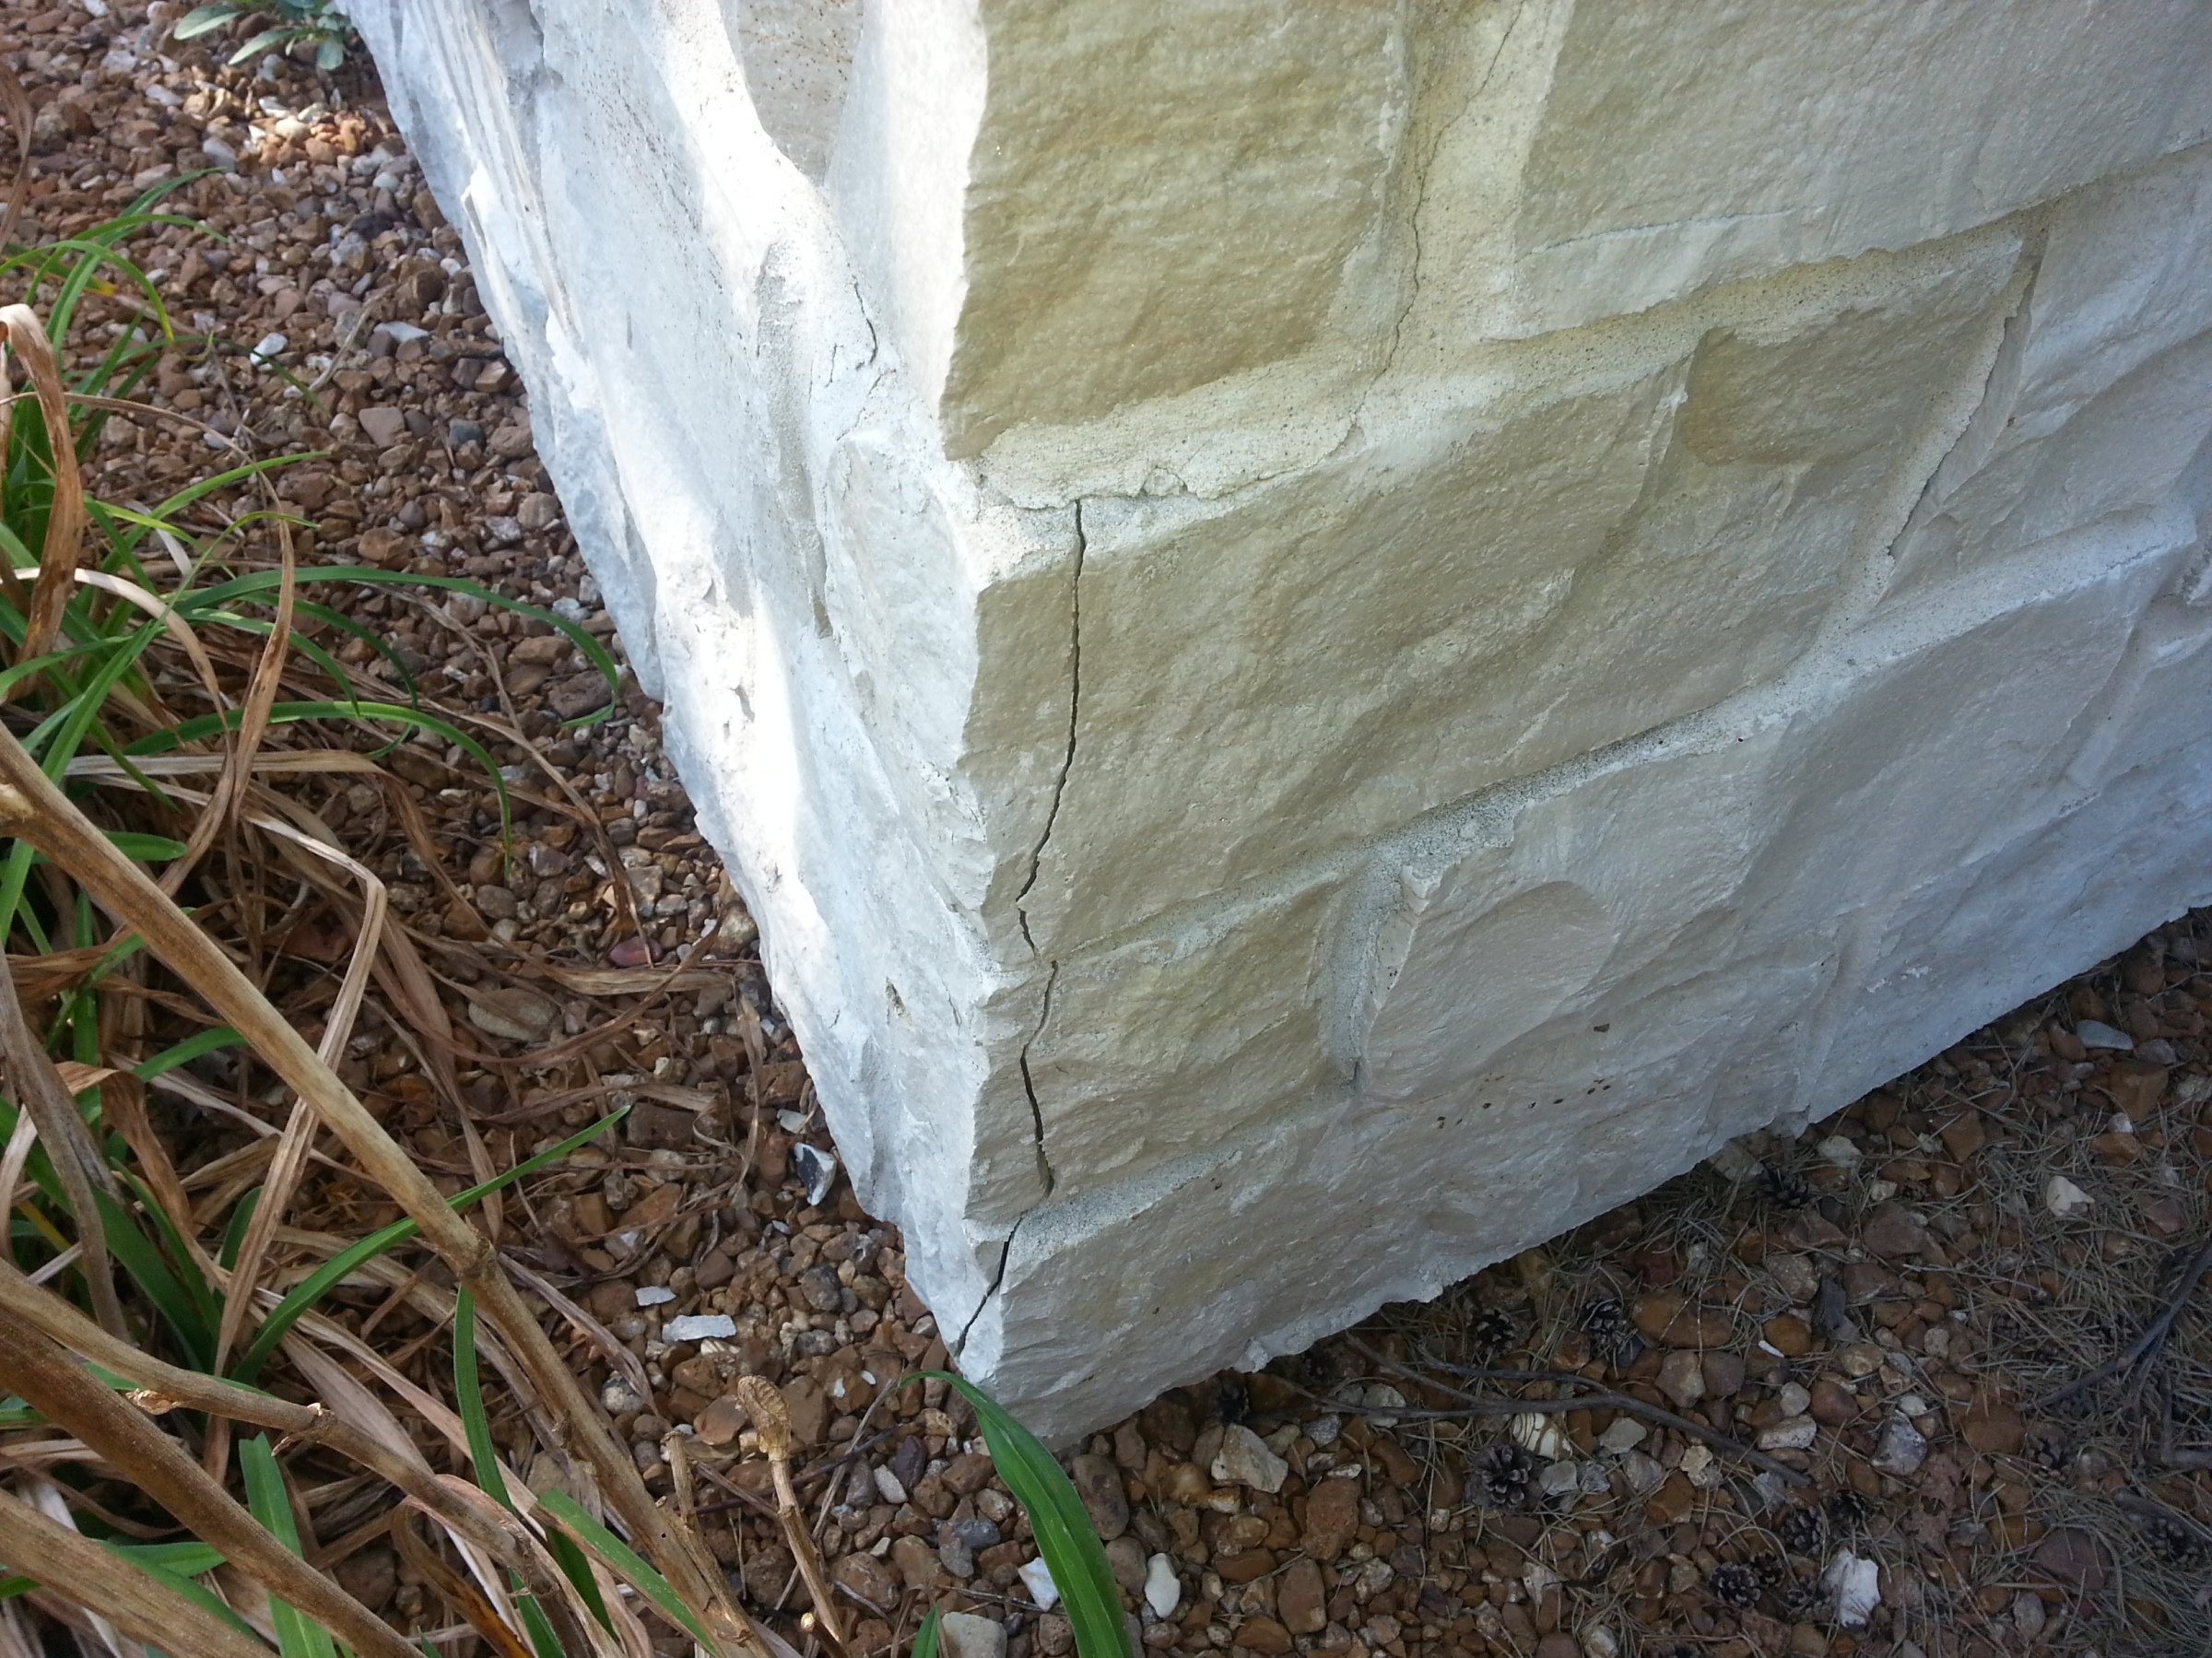
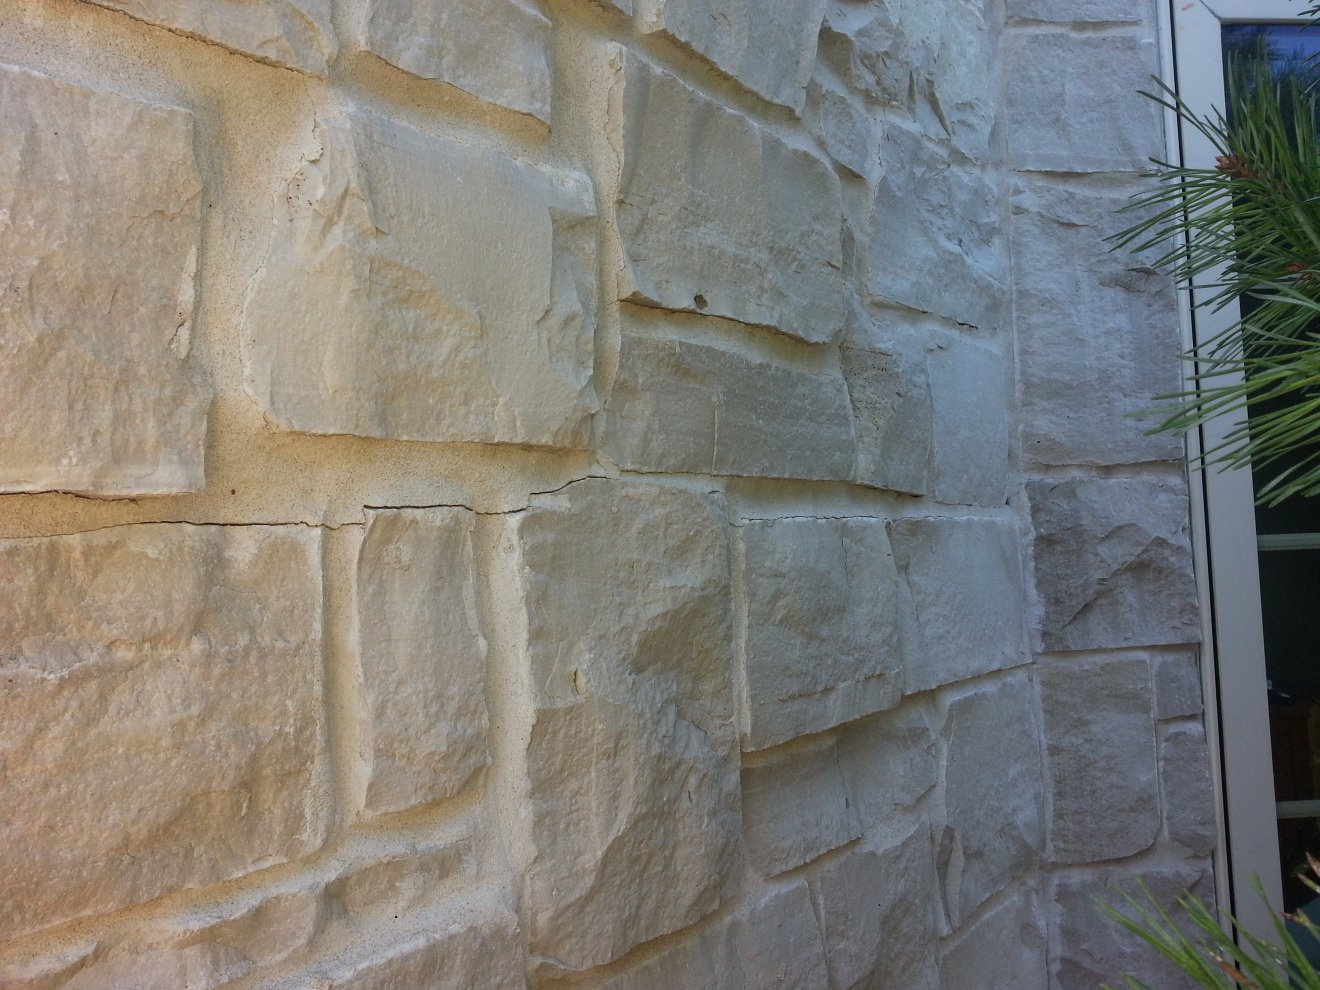 Cracking of mortar from wet and expanding wood sheathing
Thin, wet cast or dry cast stone veneers (a.k.a. fake stone, adhered manufactured stone veneer, or faux stone) started being produced and precast in concrete in the 1990s. Regardless of the terminology used, it is essentially molded concrete trying to mimic natural stone. All veneers produced prior to this time, whether artificial or natural stone, were full bed thickness and installed similar to brickwork so the issues we’re talking about today were not as prevalent. But now, 30 or 40 years later, installations have changed and rely on new combinations of a multitude of different building materials interacting with each other in various ways.
More building science research has gone into wall systems and thin veneers than ever before, and the understanding of potential problems with installation methods has increased along with it. Home inspectors are also pointing out the potential hazards from their experience in the field. We’ve come to understand that moisture can get behind the veneer, penetrate the walls and wick itself into sheathing materials such as oriented strand board (OSB). This is problematic because common building materials like OSB don’t allow vapors to transfer back and forth, so they get trapped and lead to rotting and mold over time. It’s important to note this issue is specific to thin veneer, not full bed veneer, which involves a different installation method.
DOWNLOAD THE ESTATE VENEER SERIES INSTALLATION GUIDE
We now know that something else is needed. Often, contractors might go over the water resistive barrier (WRB) with wire lath and scratch coat and then merely stick the stone on. Maybe they throw on an extra layer of WRB underneath the lath first for good measure. After the two felt layers, lath is typically directly applied, followed by a scratch coat, and then the stone. All sandwiched up against each other.
But in areas where there is high rainfall or humidity, there needs to be a space between the wall to allow moisture to work itself out of the wall. And, as atmospheric moisture is an issue in almost all parts of North America, the potential problem is across the map.
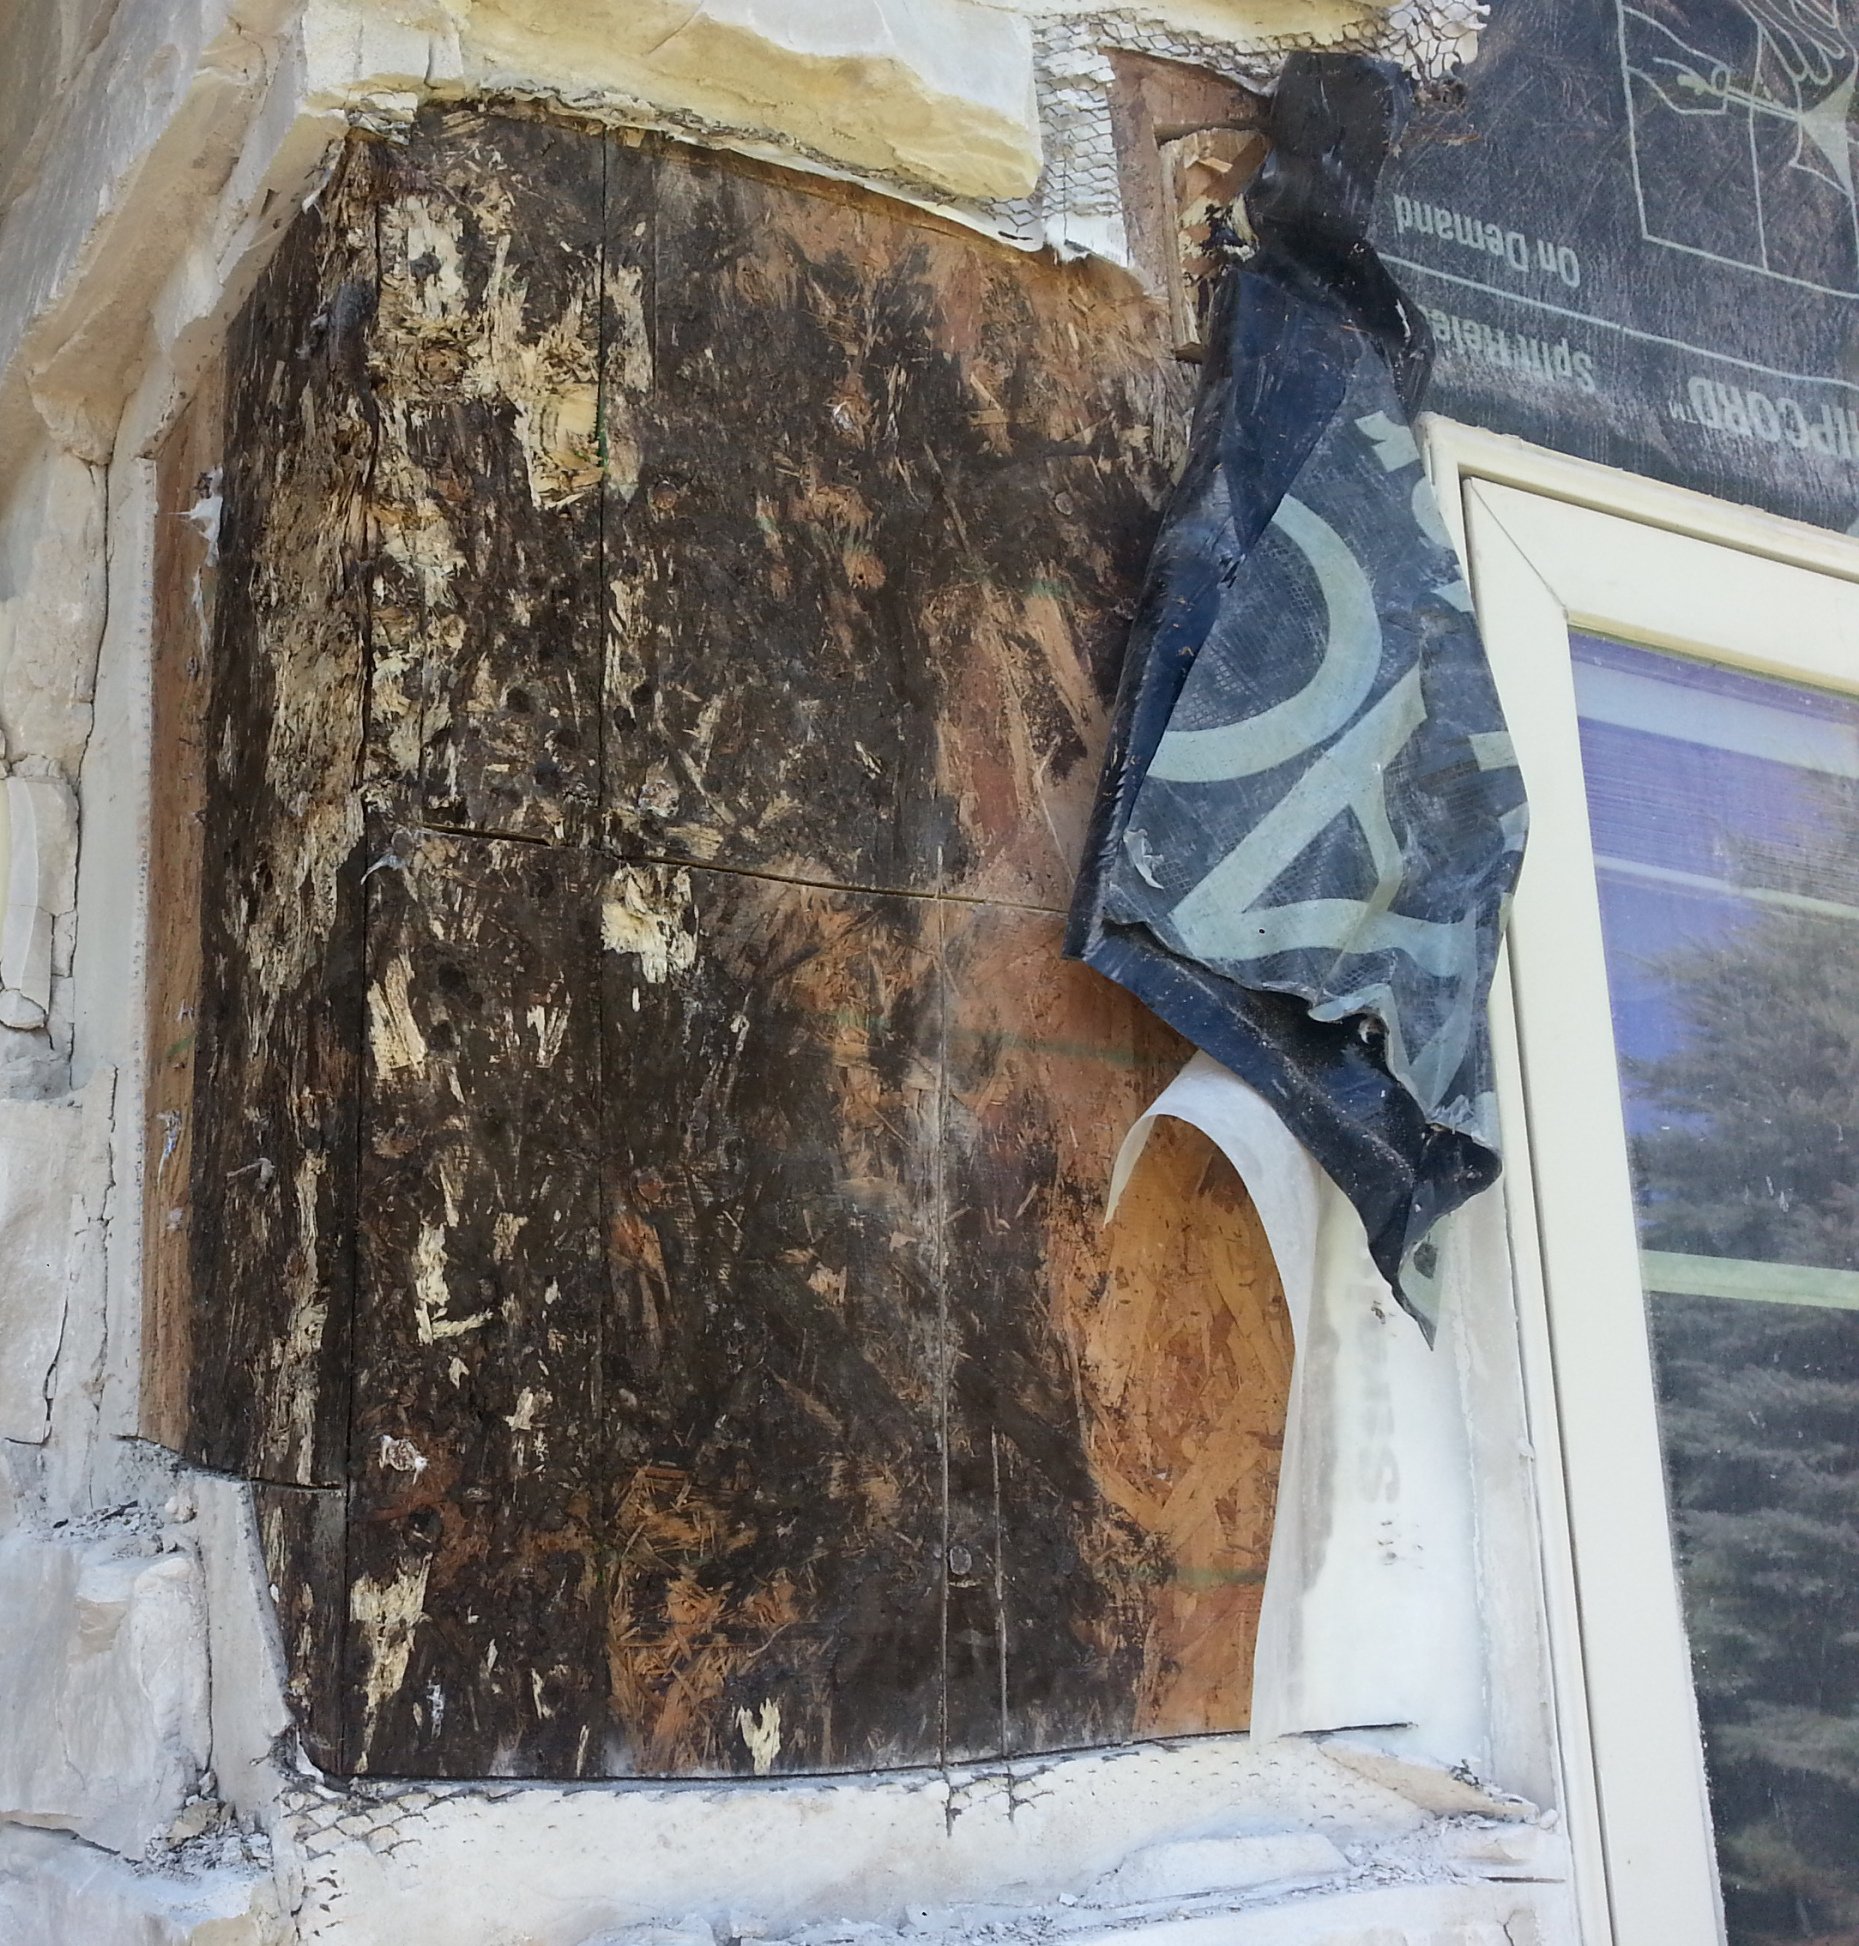 Results of moisture damage from an adhered manufactured stone veneer installation (aka fake stone).
And it is even more of a problem with manufactured stone, which allows up to 22% water absorption in the product, versus natural stone’s low water absorption rates. On the other hand, with natural stone, it’s important to remember the mortar joints. The solution is a drainage plane and a weep screed between the lath and waterproofing, which work together to serve as a vent allowing the water to drain freely behind the wall and facilitate airflow.
A drainage layer is key to getting moisture out and keeping it out — just remember to keep 'drain on the brain'! A minimum of 3/16" gap (3/8" in Canada) will allow space for air to flow and vapors to hit the wall, drop down and evaporate.
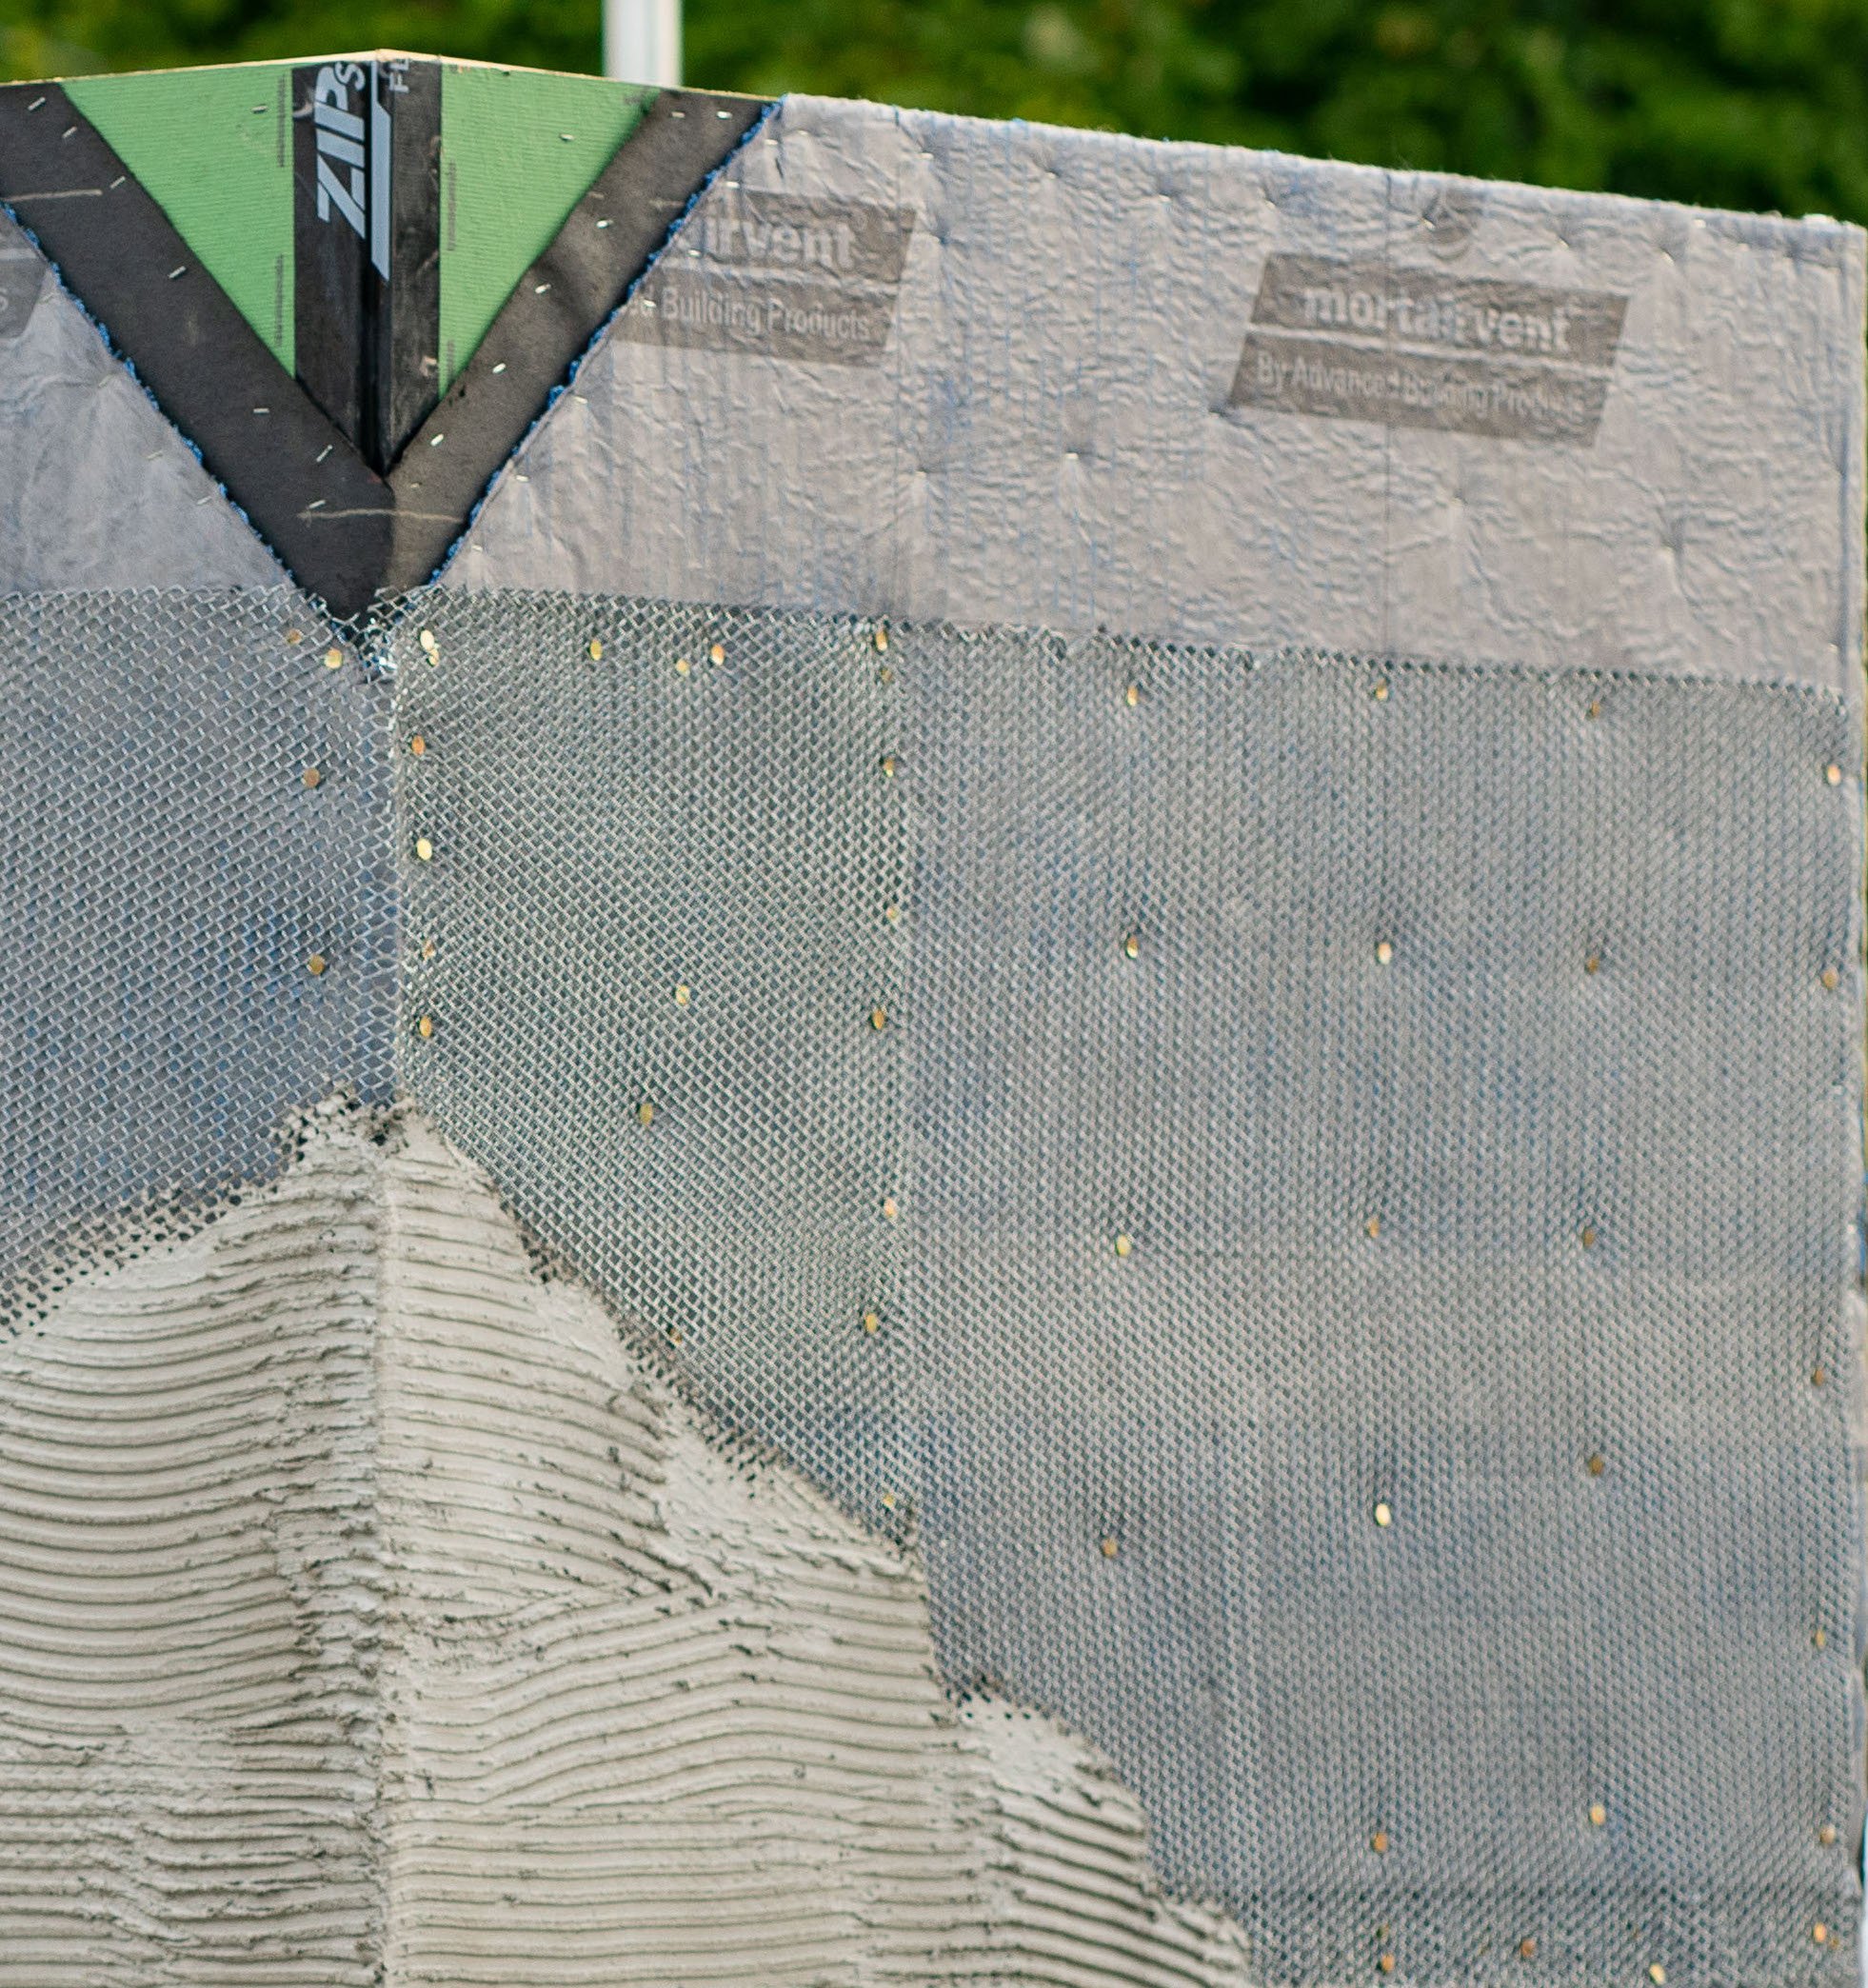
Recommended substrate configuration for natural stone thin veneer.
In short, the recommended steps that research has led us to are as follows:
- Oriented strand board (OSB)
- Two layers of water resistive barrier
- Drainage plane. (Vapors don’t move well through OSB so the drainage plane creates the air space that is so essential)
- Fasten lath on studs. The fasteners need to line up with studs (typically 16" on center) then every 6 to 8 inches vertically, to support everything. If you simply drive it into the plywood, it’s going to loosen up.
- Cover up fasteners with a lath type system. A minimum of a 2.5 galvanized (or stainless steel) lath is ideal. The fasteners also need to be galvanized (or coated), typically what’s commonly available.
- 1/2 inch scratch coat
- Set bedding
- And finally, the stone
![Residence #2 - Kansas City, MO - Indiana Limestone - Berkshire (1)[Berkshire 4-height Indiana_Limestone_Full_Color_Blend™ Hardscapes_&_Masonry Split_Face]](https://blog.polycor.com/hs-fs/hubfs/Residence%20%232%20-%20Kansas%20City,%20MO%20-%20Indiana%20Limestone%20-%20Berkshire%20(1)%5BBerkshire%204-height%20Indiana_Limestone_Full_Color_Blend%E2%84%A2%20Hardscapes_%26_Masonry%20Split_Face%5D.jpg?width=4256&name=Residence%20%232%20-%20Kansas%20City,%20MO%20-%20Indiana%20Limestone%20-%20Berkshire%20(1)%5BBerkshire%204-height%20Indiana_Limestone_Full_Color_Blend%E2%84%A2%20Hardscapes_%26_Masonry%20Split_Face%5D.jpg)
With proper prep work and sound installation methods, natural stone veneer provides long lasting protection. From split face to smooth limestone veneers, natural stone adds visual appeal to any design. Pictured: Berkshire™ Indiana Limestone thin veneer.
Remember that every area of a house is equally at risk and proper flashing details are important. So don’t forget to pay attention to the lower foundation slab areas, the junction where adjoining roof lines meet, and also windows and doors — all are common areas where water can easily penetrate. In window details, it is recommended to always leave a little bit of a gap so you can caulk the area and do a proper flash line.
Although this may sound like a lot, each step is pretty simple, and only costs pennies. And, of course, you’ll get peace of mind, which is priceless.
Learn more about installing Indiana Limestone thin veneer. Download the product sheets.