
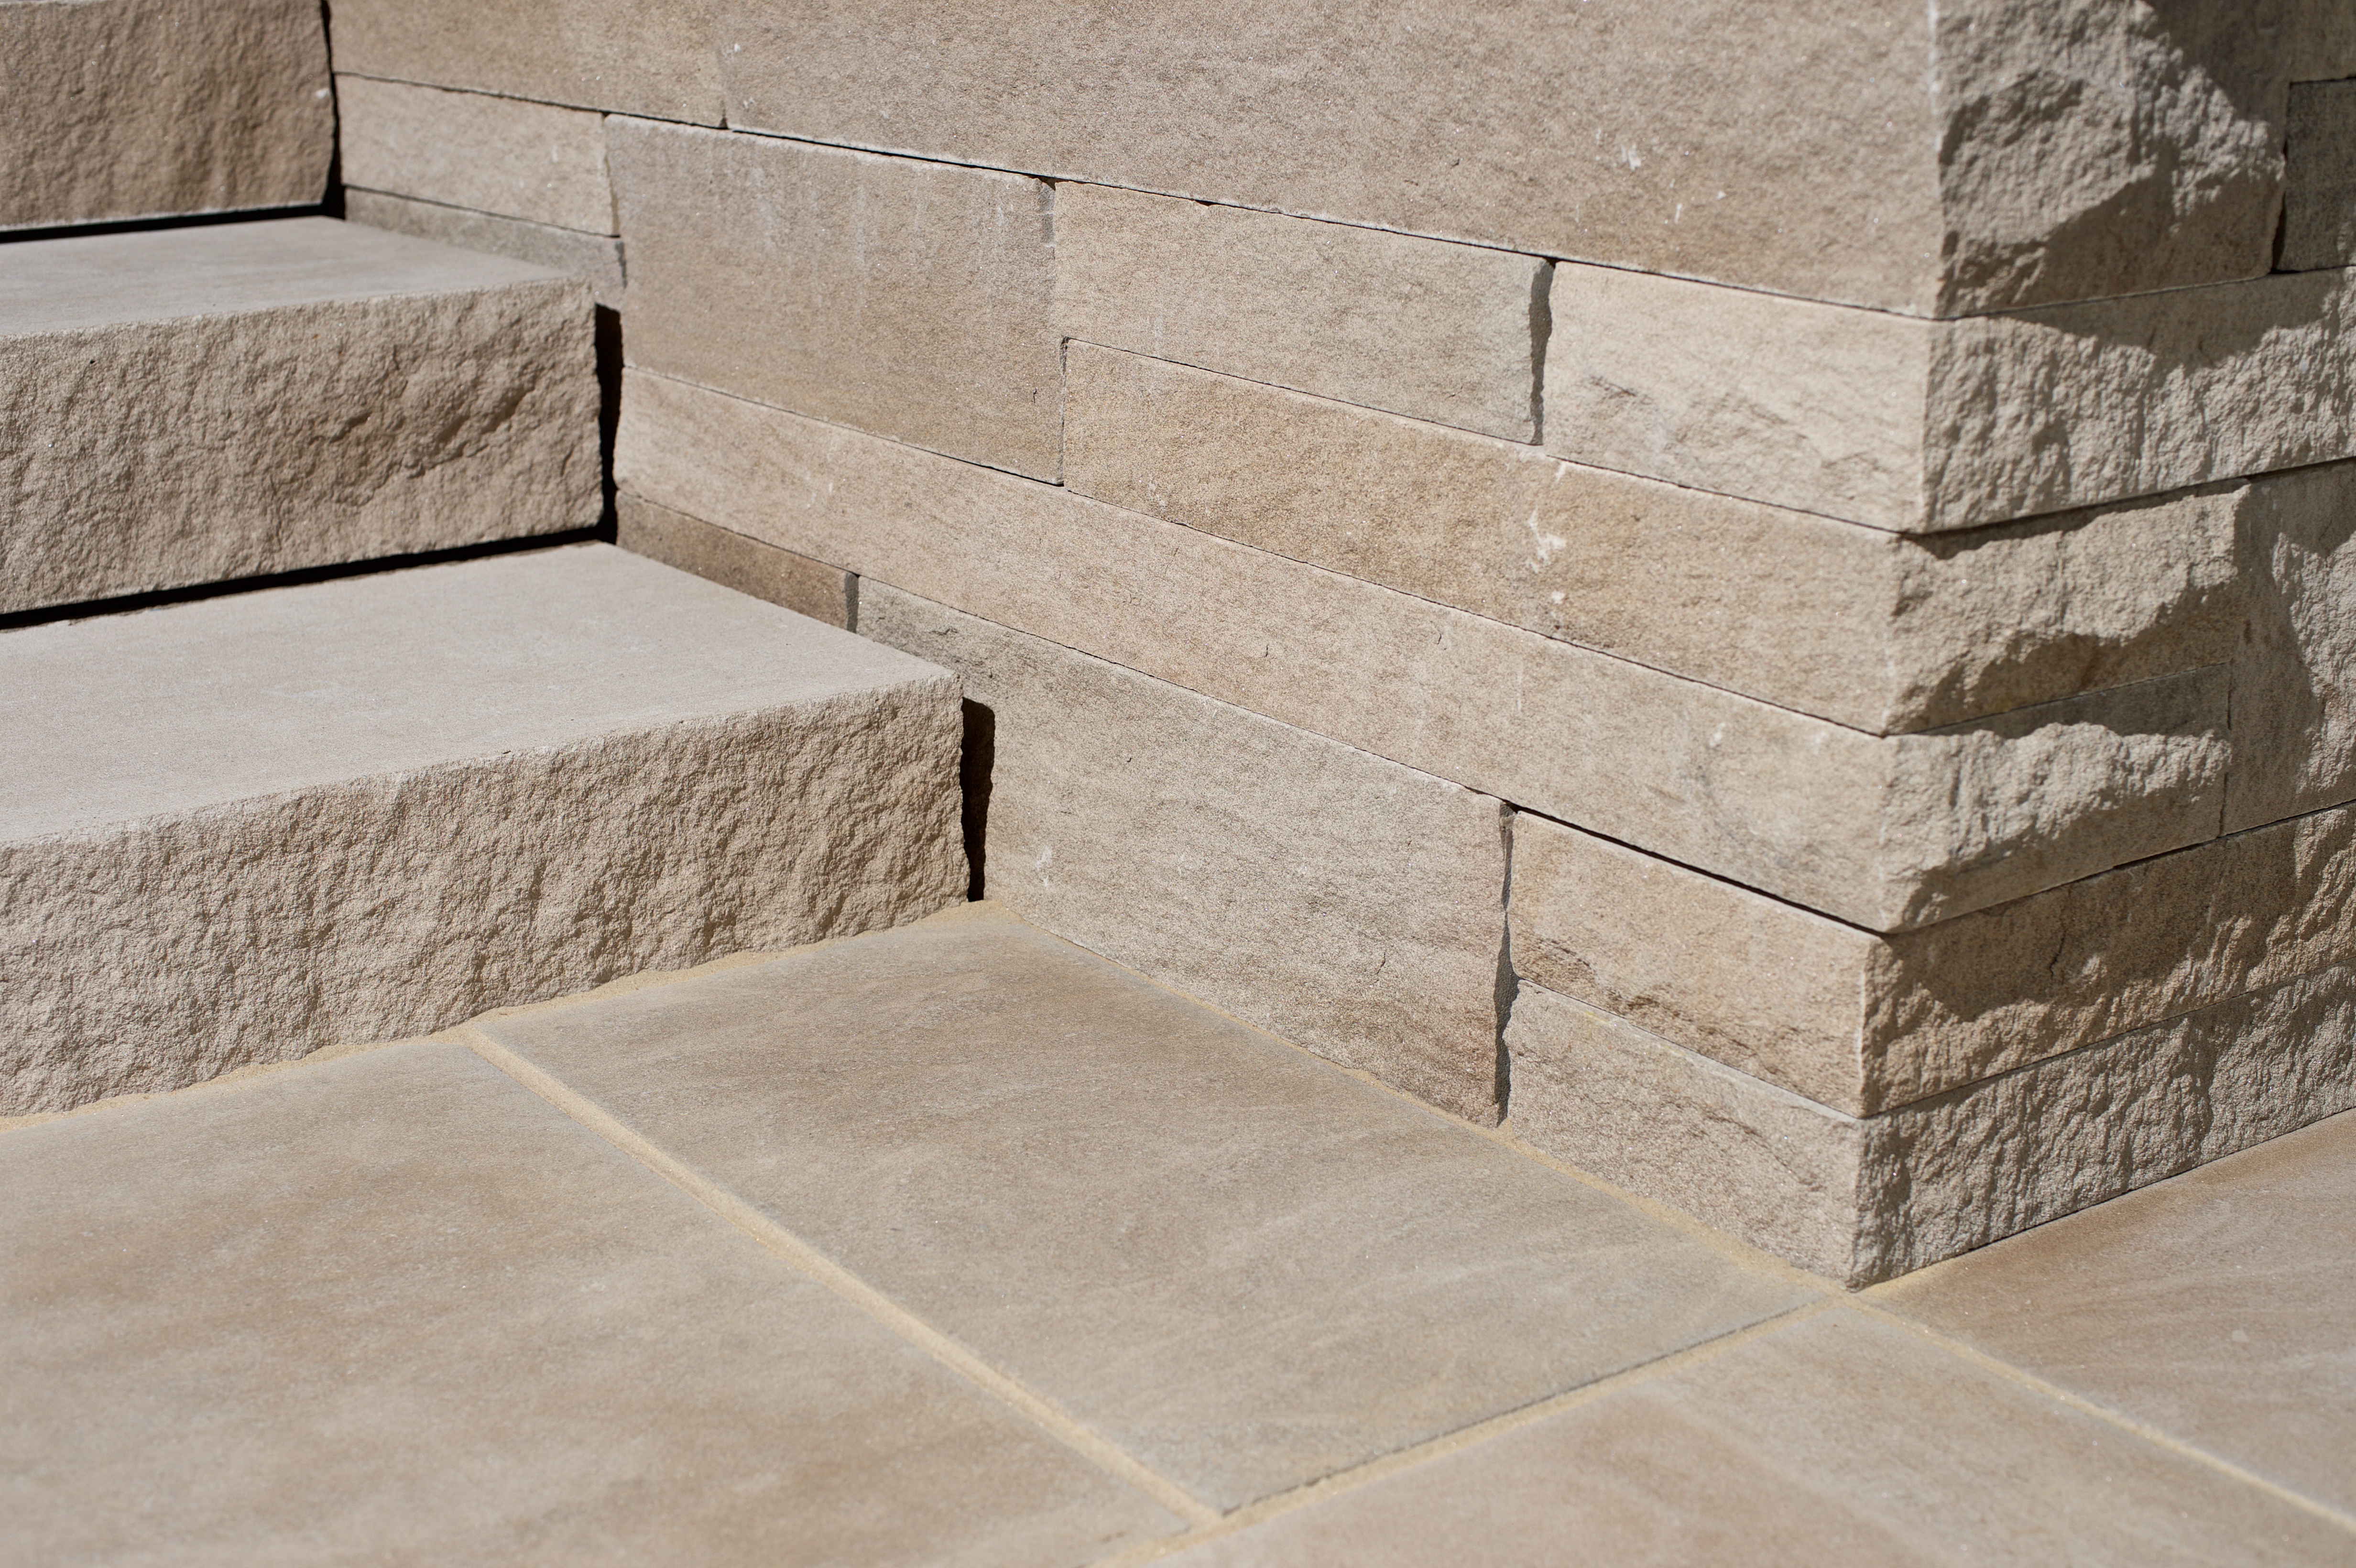
Nothing dresses up a front entryway like a pretty garden wall and choosing Indiana limestone, part of Polycor’s hardscape lineup, for the project makes it a snap to get done in just one day.
Hardscape Nate breaks down the steps and tools used to build a wall using 6” limestone units, a small project that only took about 5 hours and a 3-man crew.
Learn how to build a garden wall in one day with stock six inch pieces of Indiana Limestone.
How to build a simple garden wall using Indiana limestone
Construction of the garden wall is straightforward, and doesn’t require any major moving or lifting equipment.
Here are the 7 steps needed to create a garden wall to dress up a front entrance:
- Excavate down to subgrade soil, being careful not to let any of the dense graded base that was used for the sidewalk leading up to the home’s entrance to spill out.
- Backfill the bed with ¾” dense graded stone for the base that was about 4” thick.
- Compact the stone base with a Pave Tech pounder, one of Nate’s favorite tools, which was ideal for for the tight, confined space that will prevent settlement down the road.
- Set the garden wall’s base using a chisel and 3-pound hammer to snap the pieces into place and score the top and bottom of the wall unit.
- To ensure no future problems, double check the base level back to front, side to side.
- Use concrete adhesive to adhere the top level. Despite the units’ weight, we recommend locking them into place with a quality adhesive for added security.
- Finish the bed with a little bit of mulch to dress it up.
Learn more about Indiana Limestone products for hardscapes.
Download the product brochure.
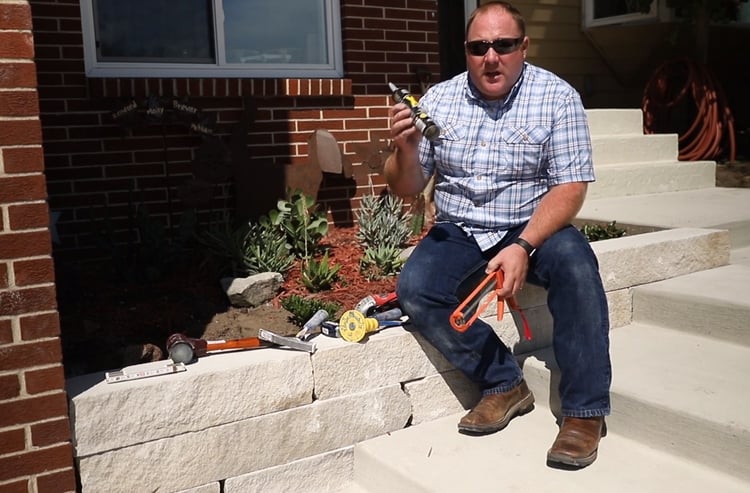
The right (and small) tools for the job
A smaller job requires small hand tools.
Here’s what was used to build this Indiana limestone garden wall:
- Mason’s rule: If you’re going to be doing this style of work, this is the style of tape measure you want to have on hand
- Hammer and chisel: To score the units and snap them at random lengths, the crew used a 3-pound maul with a chisel that had a hand guard.
- Simplex 60 mallet: This dead blow style hammer has a soft rubber head on one side and harder plastic head on the other that’s used to snap — or put pressure on — one side of the wall unit. Ideal on a project like this to get around using large breakers for that style of material.
- Mason hammer: This rocking hammer was used after the unit was snapped to finish up edges, putting a little extra rocking texture or rock face with the chisel end.
- 5-Inch Grinder: Used along with the chisel hammer to get units into tight spots.
Limestone garden walls are a non-retaining product, ideal for shallow planting beds and as defining landscape elements. Polycor makes 6” and 3” versions that can be blended to create a modular pattern that’s great for a seat wall or garden wall.
The beauty of working with limestone is that its tight, consistent grain makes it easy to manipulate and snapped to size on site. Also, the limestone’s soft, earth tones allows it to play nice with other materials and act as a neutral counterpoint to more dramatic stones.
A small garden wall can add impact no matter where it’s placed within a landscape and using Indiana limestone — with its ease of use and neutral looks — makes building it a snap.
Get the details on garden walls. Download the product sheet.
